
How to Plan a Stress-Free Bathroom Renovation in Hudson Valley
A bathroom remodel doesn’t have to be overwhelming, especially when you plan it right from the start. In fact, a national survey found that the vast majority of homeowners experience significant stress during renovations. This is especially true in older homes, where surprises like outdated wiring or hidden water damage can crop up. However, with careful planning, you can dramatically reduce those headaches.
In the Hudson Valley, some unique local factors come into play: historic homes (with all their quirks), a four-season climate, and varying town permit rules. This guide will walk you through a step-by-step plan to tackle your bathroom renovation with confidence – keeping it on track, on budget, and as stress-free as possible.
Key Takeaways
- Define clear goals and a realistic budget up front. Decide if you’re doing basic upgrades or a full luxury redesign, and set a budget range that matches your plans (mid-range bathroom remodels often run $25,000–$75,000+ depending on scope).
- Choose experienced local professionals. Hire a licensed, insured contractor familiar with Hudson Valley’s older homes and permitting process for a smoother project.
- Finalize your design early. Plan the layout and pick all fixtures before work begins – last-minute changes can cause delays and extra costs. Use tools like 3D design software to visualize the space and avoid second-guessing decisions.
- Order materials in advance. Long lead times for items like tiles, vanities or custom fixtures are a common source of delay. Selecting and purchasing key materials ahead of time keeps your project on schedule.
- Plan for permits and timeline realities. Bathroom remodels typically take about 3–6 weeks of construction on average. Build in time for permit approvals, inspections, and unexpected issues. Stay flexible and communicative with your contractor throughout the process.
Step 1 — Define Your Bathroom Goals and Budget
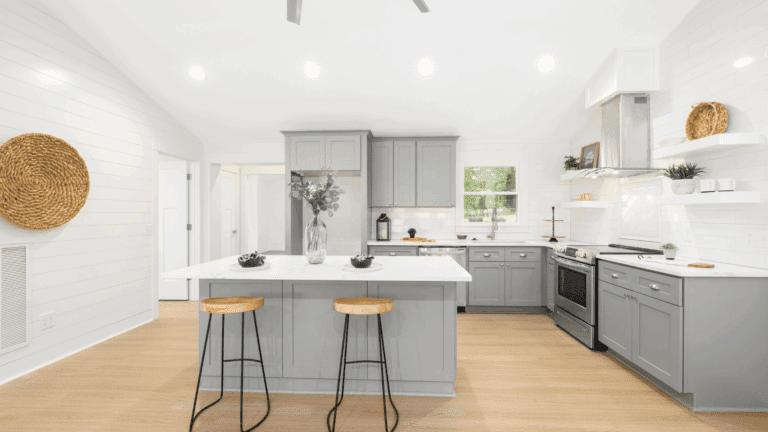
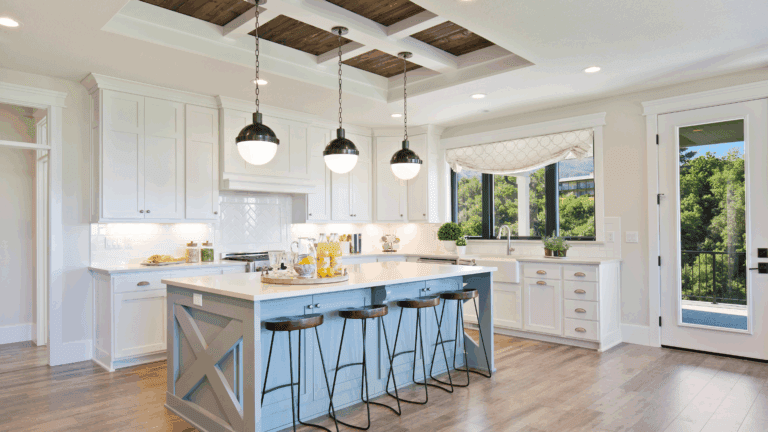
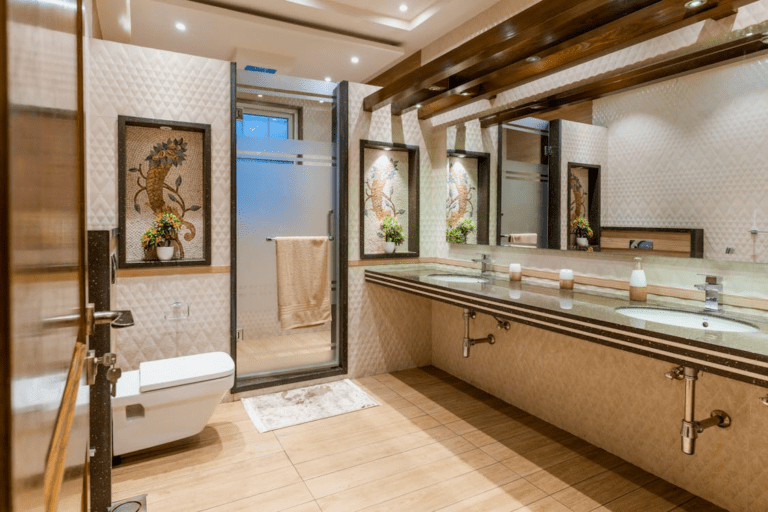
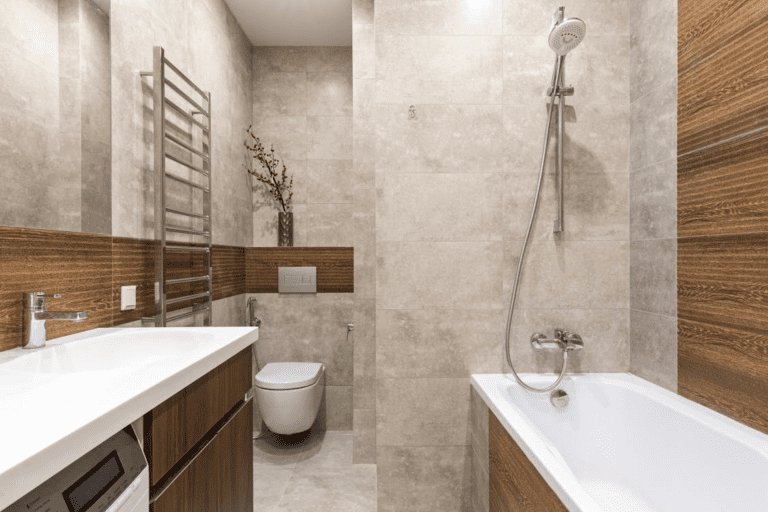
Before swinging a hammer or picking out tile, start by clarifying your goals for the renovation. Are you aiming for functional improvements – like fixing leaks, adding storage, or updating an outdated layout – or are you going for a top-to-bottom luxury redesign? Knowing your priorities will help shape both your design and your budget. For example, a “functional upgrade” might focus on new fixtures and better lighting, whereas a “luxury redesign” could involve reconfiguring the layout, high-end materials, and spa-like features such as a rainfall shower or soaking tub.

Make a wish list of features, then rank them by importance. Perhaps you absolutely need a walk-in shower to replace that old tub, or you’re dreaming of a double-sink vanity for more elbow room in the mornings. Common desires include improved storage (think recessed medicine cabinets or built-in shelving), modern fixtures, better ventilation, and maybe radiant heated flooring for chilly Hudson Valley winters. Prioritizing these goals will prevent scope creep and keep you focused on what matters most to you. From there, set a realistic budget.
Home improvement research shows bathroom remodel costs can vary widely. In New York, remodeling a bathroom typically ranges from about $8,000 up to $75,000, with an average around $28,000. A modest refresh (e.g. new fixtures and paint) will be on the lower end, whereas gut renovations with high-end finishes can easily climb to the $50k–$75k+ range. It’s wise to get rough cost estimates for your wishlist items early. That way, you can adjust the plan (or your budget) before any commitments are made.
Step 2 — Choose the Right Renovation Partner
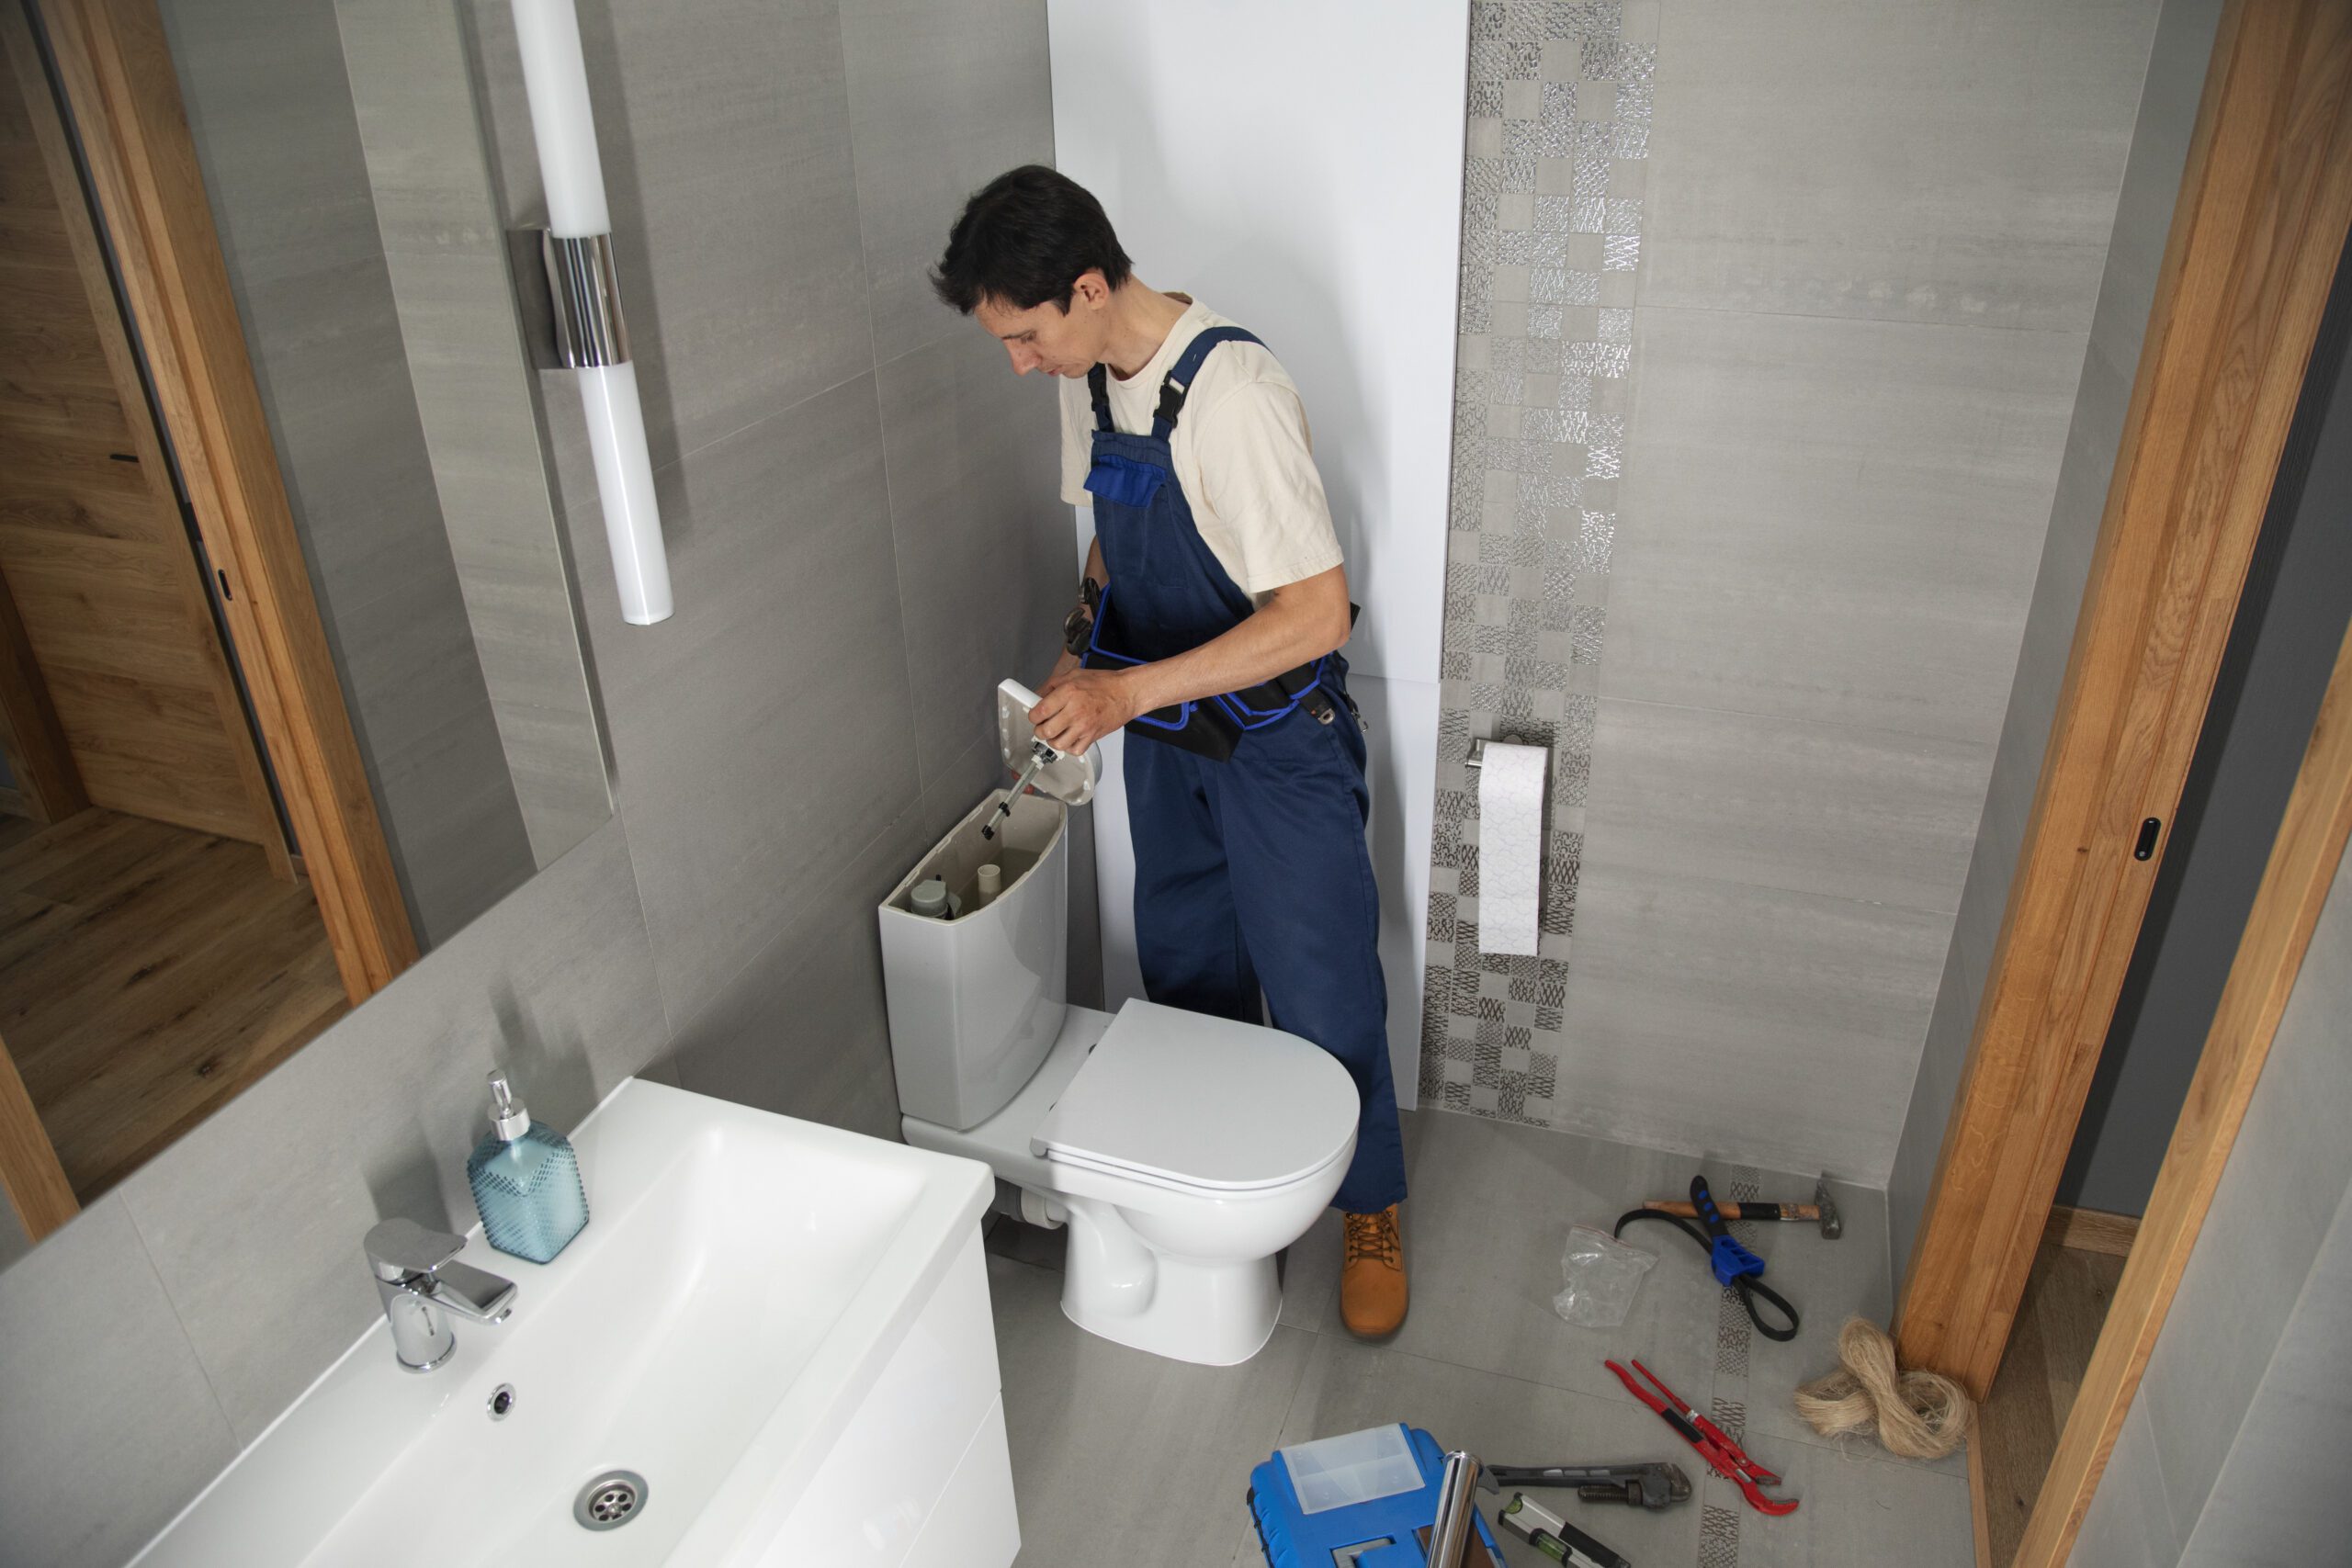
One of the most important decisions you’ll make is hiring the right contractor (or design-build firm) for the job. A bathroom remodel involves multiple trades – plumbing, electrical, carpentry, tiling – so you want someone who is experienced in managing the whole process. In the Hudson Valley, it’s particularly valuable to find contractors who have experience working on older and historic homes. Vintage homes may have idiosyncrasies like plaster walls, aging wiring, or floors that aren’t perfectly level, and a seasoned pro will know how to navigate these challenges without breaking a sweat.
Start by researching local contractors or design-build companies that specialize in bathroom renovations. Look for a proven track record in the region – ask for references from past clients with similar projects. When you speak with those references, ask how the contractor handled timelines, communication, and any surprises that arose. Were they satisfied with the quality of work? Did the project stay on schedule and budget? Getting honest feedback from previous customers is invaluable.
Verify credentials before committing. Any contractor you consider should be properly licensed and insured – this is non-negotiable for your protection. In New York State (including Hudson Valley), contractors need to hold a valid Home Improvement Contractor license for most residential work, and all electricians and plumbers should be licensed as well. Also, confirm they carry general liability insurance and workers’ compensation. According to consumer protection experts, you should only consider contractors who are licensed and insured, and don’t hesitate to ask for proof of insurance coverage.
A reputable contractor will gladly provide documentation. (If someone wants to work under the table with no permits or insurance,
that’s a huge red flag – walk away.) When vetting potential pros, also inquire about how they handle permits and inspections (more on permits in Step 5). A reliable contractor will usually handle the permitting process for you as part of their service. In fact, the FTC warns that if a contractor asks you to pull the building permit on your own, that could be a sign of a scam or an unlicensed operator.
(For more guidance on evaluating contractors, check out our blog How to Choose the Right Home Remodeling Contractor in Hudson Valley, which offers a detailed checklist of what to look for and questions to ask.)
Step 3 — Plan the Layout and Design Early
With your goals set and a pro on board, the next step is finalizing your bathroom layout and design details – as early as possible. Thoughtful planning in the design phase is key to avoiding stress later. Every change or second-guessing that happens mid-project can lead to delays and added costs, so it pays to lock in your decisions up front.
Start with the layout. Will the new bathroom configuration stay the same as the old, or are you moving major elements (toilet, shower, sink placement)? If you’re in an older Hudson Valley home, you might be constrained by things like where the main plumbing stack is or by the room’s dimensions, especially in those cozy historic layouts. Work with your designer or contractor to explore the possibilities. Even in a small bathroom, a clever reconfiguration can dramatically improve functionality – but it needs to be planned carefully. Remember that the bathroom is one of the smallest yet most complex rooms in a house, with lots of fixtures packed into a tight space, so every inch matters.
Step 4 — Order Materials and Fixtures in Advance
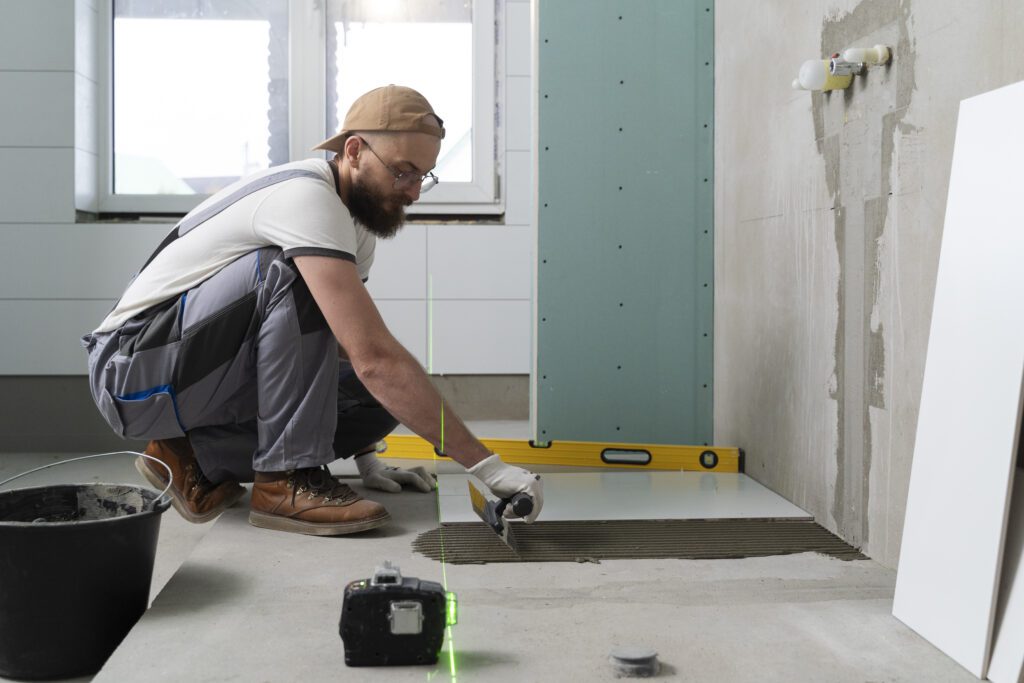
One of the most common causes of remodeling delays (and homeowner headaches) is waiting on materials. A “perfect” tile that’s on backorder for six weeks, a custom vanity stuck in freight, a specialty faucet coming from overseas – these can all stall a bathroom project if not accounted for. The good news is this stress is largely avoidable by ordering key materials well in advance. Work with your contractor or designer to identify all the long-lead items for your project. Typically, this includes: tiles (especially imported or handcrafted ones), flooring materials, plumbing fixtures (toilets, sinks, faucets, shower systems), the bathtub or shower enclosure, lighting fixtures, vanity cabinets, and any custom glass (like a frameless shower door) or custom millwork.

Aim to have these on site by the time they’re needed. That usually means ordering them early enough to account for manufacturing and shipping time. For instance, many semi-custom vanities can take 4-8 weeks to arrive from the time of order. Floor and wall tiles might be in stock at a local supplier, or they might have a lead time if they’re special order – better to find out now. If something you love has an exceptionally long lead time, you can decide whether to wait for it or choose a more readily available alternative that fits your timeline. By planning design early (as discussed in Step 3), you’ll have your product selections ready to go. Place orders as soon as the design is finalized. This is where having a local supplier or showroom in the Hudson Valley can be helpful; they may have inventory on hand or faster delivery to our region.
Plus, local suppliers are familiar with our market and can recommend quality products that won’t be a supply-chain nightmare. It’s also smart to order a little extra of certain materials, like tiles or flooring, to account for wastage or future repairs. Having an extra box of matching tile stored away means you’re prepared if a few pieces get damaged during installation (or years down the line). Why the emphasis on early ordering? Because delays in materials are a top reason projects get held up. Industry data from late 2022 showed that material availability was the number one cause of project delays for 63% of professional remodelers surveyed.
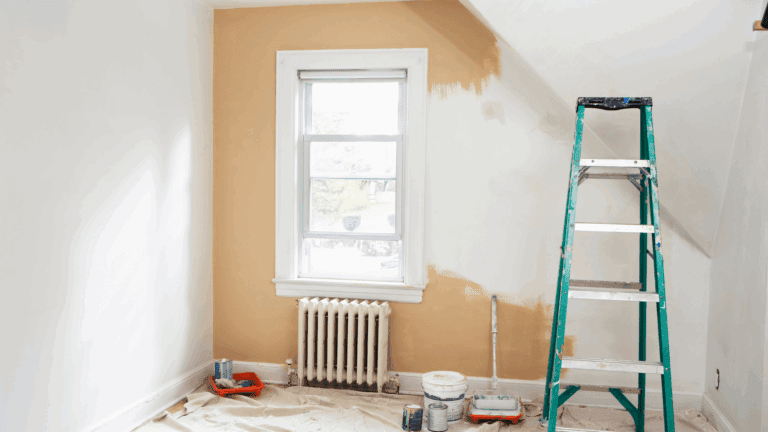
Step 5 — Secure Permits and Prepare for Demolition
Nobody loves paperwork, but permits and inspections are a vital part of a safe, legal renovation. In the Hudson Valley, different towns and villages have their own building departments and permit processes, so it’s important to research what’s required in your specific municipality. Generally speaking, for a bathroom remodel that involves any plumbing reconfiguration, electrical work, structural changes (like moving a wall or window), or major alterations, you will need a building permit.
This is mandated by New York State’s building code to ensure the work meets safety standards. Essentially, a building permit application is reviewed for code compliance and then you’ll have inspections during the project (for things like rough plumbing, electrical, and a final inspection) before it’s signed off. Your contractor will often handle the permit application and scheduling of inspections as part of their service – confirm this when you hire them. As mentioned earlier, if a contractor tells you to “just skip permits” or to file it yourself because it’s “no big deal,” that’s a huge red flag.
Here are some prep tips:
- Clear access paths: Determine which route workers will use to carry debris out and bring materials in. Remove any furniture, wall art, or breakables along that path. If they’ll be coming through the front door and up the stairs to the bathroom, for instance, take down pictures on the wall, roll up rugs, and maybe put down protective floor coverings on hardwood floors along the way.
- Set up dust protection: Containing dust is huge for keeping your sanity during a remodel. Contractors will often put up plastic sheeting barriers over the bathroom door or even temporary zipper doors to confine dust to the work area. If yours doesn’t mention it, bring it up and insist on proper dust control. You can also seal off HVAC vents in that bathroom (and adjacent rooms) so dust doesn’t blow through your heating ducts.
- Empty the bathroom completely: Prior to demo, you should remove all your personal items from the bathroom – that means towels, shower curtain, rugs, toiletries, medicine cabinet contents, etc. Also take down things like towel bars, hooks, or mirrors if you plan to reuse them (or just to get them out of the way). Basically, the bathroom should be a bare shell ready to be torn apart.
- Protect other areas: If you have a nice bedroom next to the bath, you might hang plastic over the doorway there too, just as extra protection from dust. If demolition will involve banging on walls, offload items on the other side of those walls (like pictures or shelves, which could fall). Think of it like prepping for a mini indoor hurricane – secure and remove fragile things that could be affected by a lot of vibration and dust.
- Plan for noise and disruptions: Bathroom demolition can be loud (tile removal, anyone?). If you work from home or have nervous pets, make arrangements for those first few days of heavy demo and construction noise. Maybe you’ll work from a café or have the dog stay with a friend during the noisiest days.
- Communicate with neighbors if needed: If you live in a condo or tightly clustered neighborhood, giving neighbors a heads-up about the project (and any inevitable noise or dumpster in the driveway) is a courteous move. Sometimes required if you share walls.
Step 6 — Set a Realistic Timeline and Stay Flexible
With all the planning pieces in place, it’s time to talk timeline. How long will this endeavor actually take, and how can you keep it on schedule? Being realistic (and a bit flexible) with timing will save you a lot of stress. Most bathroom remodels – once construction begins – take roughly 3 to 6 weeks of active work to complete. That’s for a typical full remodel of a mid-size bathroom.
Of course, the exact duration depends on the scope and any complexities in your project. A small powder room facelift might be done in 2 weeks, while a large master bathroom with custom cabinetry, moving walls, or other complications could run 6-8 weeks.
Bonus Tips to Minimize Stress During the Renovation
Even with great planning, living through a renovation can be challenging. Here are some extra tips from the pros (and seasoned homeowners) to help you keep your cool and maintain a sense of normalcy:
- Set up a temporary wash station: If your bathroom is out of commission and you don’t have another convenient sink or shower, set up an alternative. For instance, you might temporarily move your toothbrush and skincare to the kitchen sink area. If the weather’s warm and you’re adventurous, an outdoor camping shower bag could work for a short time, or coordinate gym visits for showers. Planning this in advance reduces daily-life disruption.
- Use dust barriers and protect your space: We mentioned this before, but it’s worth repeating. Isolate the work area with plastic sheeting and use floor coverings in walkways. Consider asking your contractor if they can set up an exhaust fan to a window in the bathroom to draw dust out. Many contractors now use air scrubbers (filter machines) as well. The less dust and mess that spreads to the rest of your house, the less stressed you’ll feel. You’ll also want to change your HVAC filters more frequently during the project if your system is running, because dust finds its way in.
- Coordinate work hours to your routine: Talk to your contractor about the daily schedule. If you have kids napping or you work night shifts and sleep in the mornings, for example, let them know so they can plan noisy tasks accordingly if possible. Most crews will start around 8am or so – knowing that, you might want to plan to be out of the house running errands or at work during the loudest times. Setting expectations (like “please no work before 8am or after 5pm without asking”) can help prevent stress. Also find out how the crew will access your home (will you leave a key, or be home to let them in each day?) to avoid any confusion or security worries.
- Keep a project binder or digital log: Centralize all important info – contracts, designs, product specs, receipts, permit documents, and a running to-do/decision list – in one place. Whether it’s a physical binder or a shared Google Doc, this becomes your renovation bible. It helps you track progress, note what’s been decided, and jot down questions as they come up. When everything is organized, you won’t be frantically searching through emails for the paint color code or the faucet model number.

- Anticipate the emotional curve: It’s common to feel renovation fatigue at some point. There’s even a term “renovation burnout,” and surveys have noted over half of homeowners experience emotional fatigue during remodels. Just knowing this is normal helps. Expect that there may be a day you’re asking “Why did I start this?” – usually when the bathroom looks worse before it looks better. Power through, because soon after, the new stuff starts going in and excitement returns.
- Be ready for small decisions on the fly: Despite the best planning, tiny questions will come up: exactly where do you want that towel bar? Which direction should the tiles be oriented? These usually need quick answers. To reduce stress, try to pre-think some of these details (perhaps you already noted them in your design plan). If not, don’t overanalyze – trust your gut or your contractor’s suggestion, and move on.
- Celebrate milestones: This might sound cheesy, but it helps psychologically. When demolition is done, treat yourself to something (nice dinner out, etc.) – you survived the mess! When tiling is finished, celebrate that a major step is complete. It creates a sense of progress. If you can, take progress photos – before, during, after. Seeing the transformation unfold can actually be fun and gratifying, which counters stress.
In essence, maintaining a bit of control over your environment, staying organized, and keeping perspective are the secrets to a low-stress remodel. No renovation is 100% bump-free, but by using these tactics you greatly minimize the inconveniences. Many homeowners even find that with good planning, the process was “not nearly as bad as I imagined.” And with each day, you’re closer to that dream bathroom.
Let Us Help You Remodel Without the Headaches
At Chiusano Design Build, our mission is right there in our name – design and build, with a stress-free experience from start to finish. We’ve helped many Hudson Valley homeowners navigate bathroom renovations just like the one you’re planning, and we pride ourselves on sweating the details so you don’t have to. From the initial brainstorming of your bathroom goals, through meticulous planning and 3D design, to the final coat of paint, our team handles every aspect. We understand the local building codes and permitting processes in the Hudson Valley’s towns (so no surprises with paperwork), and our crew has tons of experience working in the classic homes of this region – we know how to solve the quirks that come with older construction.
Our design process involves really understanding your needs and style, so that the finished bathroom isn’t just an improvement – it’s your personal oasis that functions beautifully for your lifestyle. Imagine enjoying a spa-like master bath with zero hassle because it was all handled by one cohesive team. Or upgrading that old hall bathroom and knowing every detail – from the waterproofing behind the tiles to the final light fixture install – was done to the highest standard. That’s the peace of mind we aim to provide. We also know renovation is a big deal for your daily life, so we strive to make the construction phase as livable as possible: neat work sites, respectful crews, and efficient timelines.
If you’re ready to take the next step toward your dream bathroom, let us take the stress off your shoulders. We offer consultations where we can discuss your ideas, budget, and timeline, and share how our process can make it a smooth journey. There’s no obligation just good conversation about your project. Don’t let worry or uncertainty hold you back from the bathroom you’ve always wanted. Whether you’re doing a modest update or a complete luxury makeover, we’re here to guide you with expertise and care.
Related: Luxury Bathroom Upgrades in Hudson Valley.
Schedule a Consultation with Chiusano Design Build and take the first step toward a stunning new bathroom, minus the headaches. We’ll handle the hard parts, so you can start planning your first bubble bath in your beautiful new space!
Bathroom Renovation FAQs
How long does a typical bathroom remodel take?
A standard bathroom remodel usually takes around 3 to 6 weeks of construction work once the project starts. This includes demolition, rough plumbing/electrical, inspections, installation of finishes, and final adjustments. Keep in mind, this timeline can vary based on the scope: a small cosmetic update might be faster (1-2 weeks), while an extensive remodel or moving walls/plumbing could take closer to 6-8 weeks.
What should I do to prepare my home before demolition?
Preparing your home before the renovation crew arrives can protect your property and reduce stress. Clear out the bathroom completely. Remove all personal items, decorations, shower curtains, etc. If you have items in adjacent rooms (like pictures on a shared wall), take those down as well due to vibrations from demo. Set up dust barriers by hanging plastic sheeting over the door and any openings.
Can I use my bathroom during the remodel?
During a full bathroom remodel, the bathroom will be largely out of service. Once demolition begins, the fixtures are removed. You won’t have a working toilet, sink, or shower in that space for most of the renovation duration. If you have more than one bathroom in your home, you’ll need to have everyone in the household share the remaining one for the time being.
Do I need permits for a bathroom renovation in Hudson Valley?
In most cases, yes, you will need a building permit for a bathroom renovation, as well as plumbing and/or electrical permits if those systems are being modified. New York State building regulations require a permit for any significant construction, renovation, alteration or repairs to a structure. This includes remodeling a bathroom when you are moving plumbing lines, installing new electrical wiring, changing the layout, or making structural changes (even something like framing a new shower wall). Cosmetic updates (like replacing faucets or painting) typically don’t need a permit. Because the Hudson Valley region has many different municipalities, you should check with your local building department.
When is the best time of year to remodel a bathroom in the Hudson Valley?
You can remodel a bathroom at any time of year, but there are some considerations with each season. Many homeowners prefer to undertake interior projects like bathrooms in the winter or early spring. In the Hudson Valley, winter tends to be a slower season for contractors, so you might find scheduling a bit easier and possibly faster start times. Since bathroom work is indoors, it’s not as affected by cold weather though extreme snowstorms could cause minor delays in getting crews or materials on site.