
How to Plan a Home Addition: A Complete Step-by-Step Guide for Homeowners
Planning a home addition requires careful consideration of budget, zoning regulations, design compatibility, and contractor selection to ensure your project adds value and functionality to your home. From initial concept to final construction, proper planning prevents costly mistakes and creates seamless integration with your existing structure.
Whether you need more living space for a growing family or want to increase your home’s market value, understanding the planning process is essential. This comprehensive guide walks you through every critical phase of planning a successful home addition project.
Key Takeaways: Essential Steps for Planning Your Home Addition
- Establish a realistic budget early including 10-20% contingency for unexpected costs and permit fees
- Verify local zoning laws and setback requirements before finalizing design plans to avoid compliance issues
- Choose the right addition type based on your needs, property layout, and long-term value considerations
- Hire experienced professionals including architects, engineers, and licensed contractors with proven track records
- Plan for temporary disruptions to daily living and create contingency plans for construction timelines
- Focus on architectural harmony to ensure your addition blends seamlessly with your existing home’s style
What Should You Consider Before Starting a Home Addition?
Before breaking ground on any home addition, you need to assess several fundamental factors that will determine your project’s feasibility and success. Your property’s physical characteristics, local regulations, and financial capacity form the foundation of viable addition planning.
Start by evaluating your lot size and existing home footprint. Many municipalities enforce setback requirements that dictate how close structures can be to property lines. These restrictions may limit the size or placement of your addition, potentially making a vertical addition more practical than a horizontal expansion.
Review your home’s current structural condition and systems. An older home may require foundation reinforcement, electrical panel upgrades, or HVAC system expansion to support an addition. These infrastructure improvements significantly impact your total project cost.
Understanding Your Budget and Financing Options
Most home additions cost between $150 to $400 per square foot depending on complexity, materials, and finishes. A 400-square-foot addition could range from $60,000 to $160,000 or more. Always include a 10-20% contingency fund for unforeseen expenses that inevitably arise during construction.
Common financing options include home equity loans, home equity lines of credit (HELOCs), cash-out refinancing, or construction loans. Each option has distinct advantages regarding interest rates, tax deductibility, and repayment terms. For detailed cost considerations, exploring remodeling cost factors can provide valuable insights.
| Addition Type | Average Cost Range | Best For |
| Bump-out (2-15 ft) | $5,000 – $30,000 | Small kitchen or bathroom expansions |
| Single-room addition | $40,000 – $120,000 | Bedrooms, home offices, sunrooms |
| Second-story addition | $100,000 – $300,000 | Multiple rooms without using yard space |
| Full in-law suite | $80,000 – $250,000 | Multigenerational living arrangements |
How Do You Choose the Right Type of Home Addition?
Selecting the appropriate addition type depends on your specific needs, property constraints, and budget parameters. The right choice balances functional requirements with construction feasibility and return on investment.
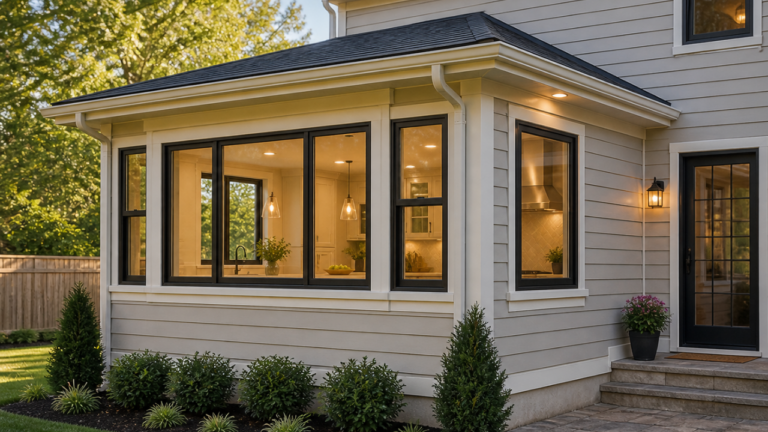
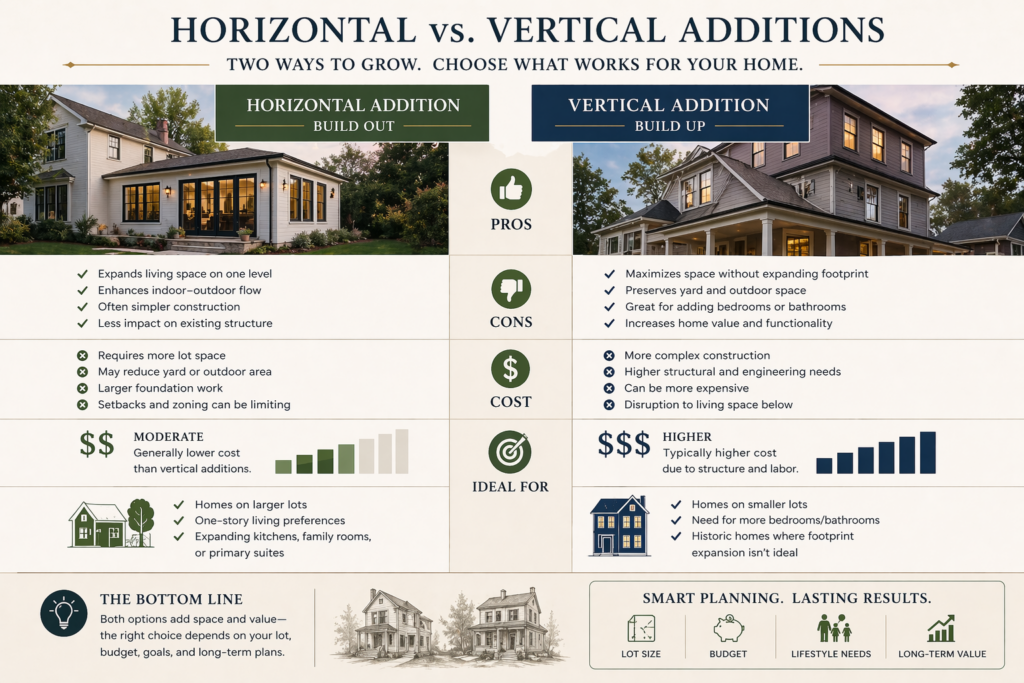
Horizontal additions extend outward from your home’s existing footprint. These work well when you have adequate yard space and want ground-level access. Common horizontal additions include family room extensions, master suite additions, or sunrooms that capitalize on outdoor views.
Horizontal vs. Vertical Additions
Vertical additions build upward, adding a second story or expanding attic space into livable area. Second-story additions typically cost 10-30% more per square foot than ground-level additions due to structural reinforcement requirements and more complex construction logistics.
However, vertical additions preserve yard space and may be your only option on smaller lots with strict setback requirements. They also create opportunities for enhanced views and natural light from elevated positions.
Specialty Addition Considerations
Certain addition types serve specific purposes and require specialized planning. In-law suites or accessory dwelling units need separate entrances, full kitchens, and bathrooms, potentially requiring additional permits and inspections. These self-contained spaces command premium value but involve higher construction complexity.
Garage additions not only provide vehicle storage but can include bonus rooms above for home offices or guest spaces. Converting existing garage space while adding a new structure elsewhere maintains or increases total square footage while repurposing underutilized areas.
What Are the Critical Zoning and Permit Requirements?
Nearly all home additions require building permits, and many trigger zoning review to ensure compliance with local ordinances. Skipping this crucial step can result in stop-work orders, fines, or even mandatory removal of unpermitted construction.
Contact your local building department early in the planning process to understand specific requirements. Most jurisdictions require detailed architectural plans, engineering calculations for structural elements, and proof of property ownership before issuing permits.
Understanding Setbacks and Building Codes
Setback requirements establish minimum distances between structures and property boundaries. Front, side, and rear setbacks vary by zoning district and can significantly constrain addition placement. Some areas also enforce height restrictions that limit second-story additions.
Lot coverage ratios dictate the maximum percentage of your property that can contain structures. If your existing home already approaches this limit, you may need to pursue variances or consider alternative solutions like basement finishing instead of new construction.
| Permit Type | When Required | Typical Processing Time |
| Building Permit | All structural additions | 2-6 weeks |
| Zoning Variance | When setbacks/codes can’t be met | 4-12 weeks |
| Electrical Permit | New circuits and service upgrades | 1-2 weeks |
| Plumbing Permit | New bathrooms or kitchen extensions | 1-2 weeks |
How Should You Select and Work With Design Professionals?
Professional design services transform your vision into buildable plans while ensuring code compliance and structural integrity. Architects specialize in aesthetic design and spatial planning, while structural engineers focus on load-bearing calculations and foundation requirements.
For complex additions involving significant structural modifications or second-story construction, hiring both an architect and engineer is advisable. Simpler projects like single-room additions might only require design-build services where one firm handles both design and construction.
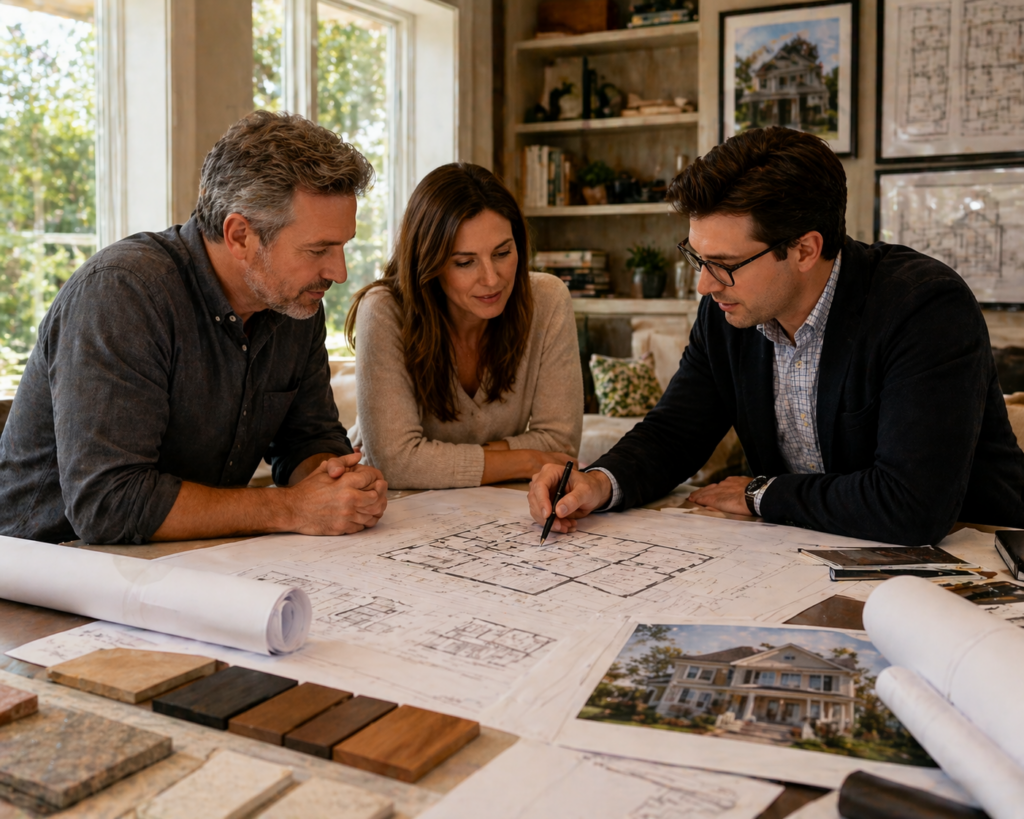
Essential Questions to Ask Design Professionals
When interviewing architects or designers, inquire about their experience with additions similar to yours. Request examples of completed projects and ask how they handled challenges like matching existing architecture or working within tight site constraints.
Understand their fee structure upfront. Architects typically charge 8-15% of total construction costs, hourly rates ranging from $100-$250, or fixed fees for complete design packages. Clarify what deliverables are included, such as 3D renderings, material specifications, and permit application assistance.
What’s Involved in Choosing the Right Contractor?
Your contractor selection directly impacts project quality, timeline adherence, and overall satisfaction with the finished addition. Experienced contractors bring technical expertise, problem-solving abilities, and coordination skills that prevent costly mistakes.
Start by gathering recommendations from friends, neighbors, or design professionals who have completed similar projects. Verify each candidate holds proper licensing, insurance coverage, and worker’s compensation policies to protect you from liability.
When researching contractors, understanding what to look for helps tremendously. The guide on choosing right contractor provides detailed criteria for vetting professionals and avoiding common pitfalls.
Evaluating Contractor Bids and Proposals
Request detailed written estimates from at least three qualified contractors. Complete bids should itemize materials, labor, permits, and contingencies rather than providing single lump-sum figures. This transparency allows you to compare proposals accurately and understand where your money goes.
The lowest bid isn’t always the best choice. Evaluate each contractor’s timeline estimates, material quality specifications, warranty offerings, and payment schedules. Contractors requiring large upfront deposits or full payment before substantial completion raise red flags.
| Contractor Qualification | Why It Matters | How to Verify |
| Active License | Legal compliance and professionalism | State licensing board website |
| Liability Insurance | Protects you from property damage claims | Request certificate of insurance |
| Workers’ Compensation | Covers employee injuries on your property | Certificate from insurance provider |
| References | Demonstrates track record and reliability | Contact recent clients directly |
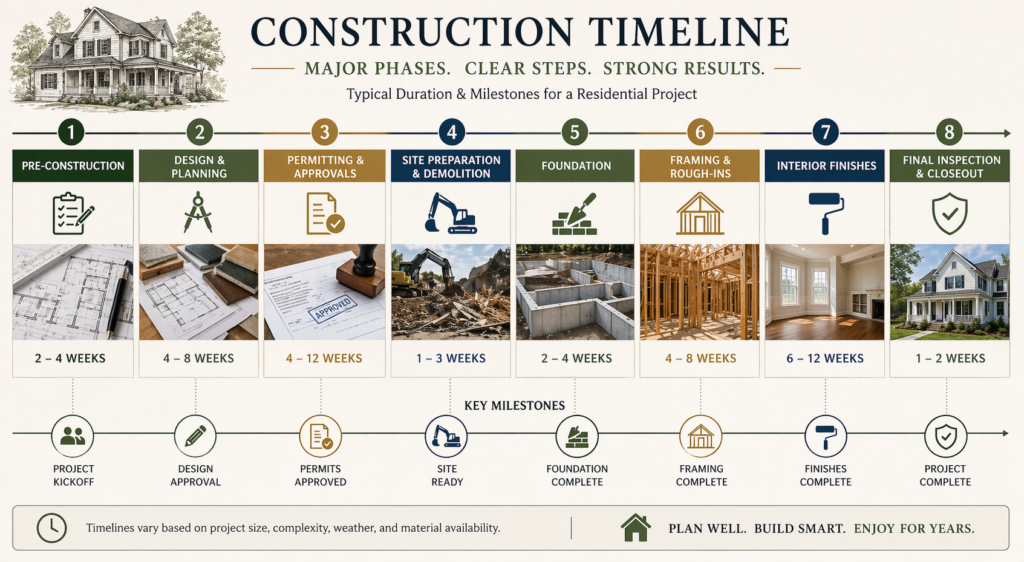
How Do You Create an Effective Project Timeline?
Realistic timeline planning prevents frustration and helps you prepare for temporary disruptions to daily life. Most home additions take 3-6 months from permit approval to completion, though complex projects can extend 8-12 months.
The design and permitting phase typically consumes 6-12 weeks before construction begins. This period includes finalizing plans, submitting permit applications, and addressing any revision requests from building departments. Rushing this phase often leads to costly changes during construction.
Understanding Construction Phase Durations
Foundation work and structural framing generally take 2-4 weeks depending on weather conditions and addition size. Rough-in work for plumbing, electrical, and HVAC systems follows, requiring another 2-3 weeks before inspections and insulation installation.
Finishing work including drywall, flooring, cabinetry, and trim represents the longest phase, often spanning 6-8 weeks. Unexpected delays from material backorders, weather interruptions, or inspection corrections are common, making contingency planning essential.
For homeowners concerned about costs, exploring strategies for home remodeling on budget can help identify areas where you can save without sacrificing quality.
Planning for Seasonal Considerations
Weather significantly impacts construction schedules. Foundation work and exterior framing proceed most efficiently during dry, moderate weather. Winter construction in cold climates requires additional precautions and may extend timelines by 20-30%.
Timing also affects contractor availability and material costs. Spring and summer represent peak construction seasons with higher demand and potentially premium pricing. For insights on optimal scheduling, the article about best time to remodel explores seasonal advantages and considerations.
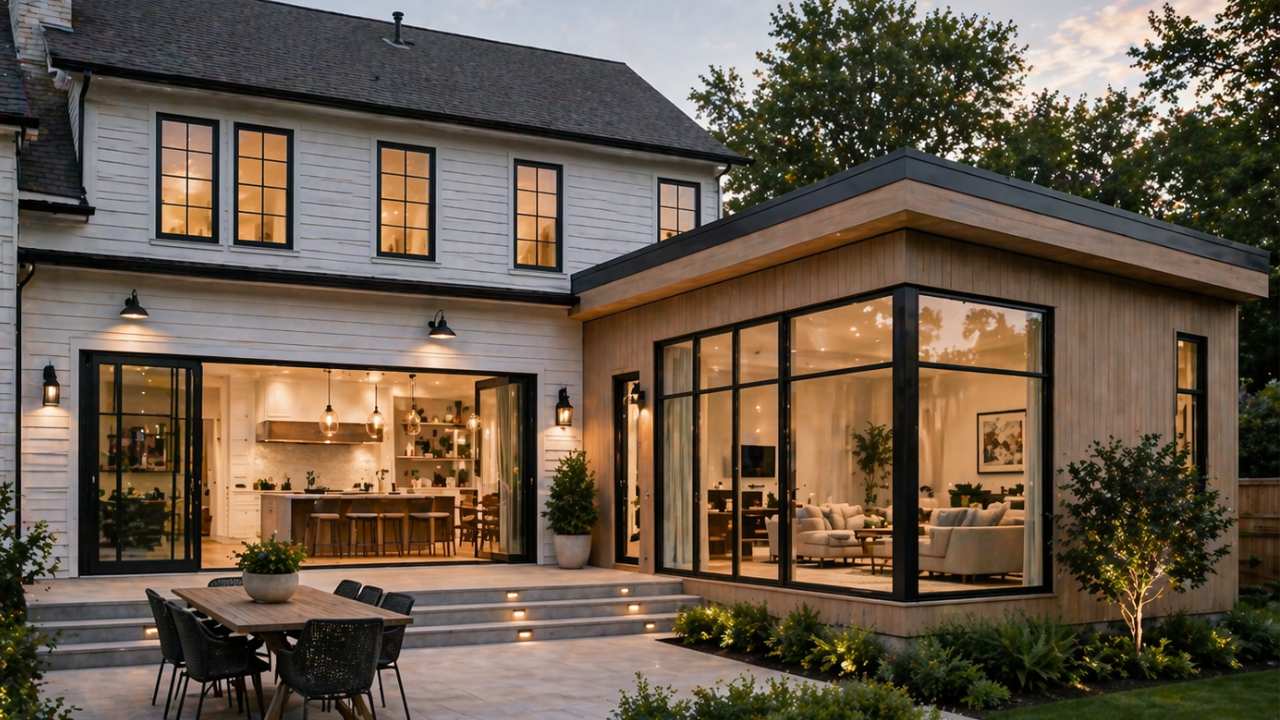
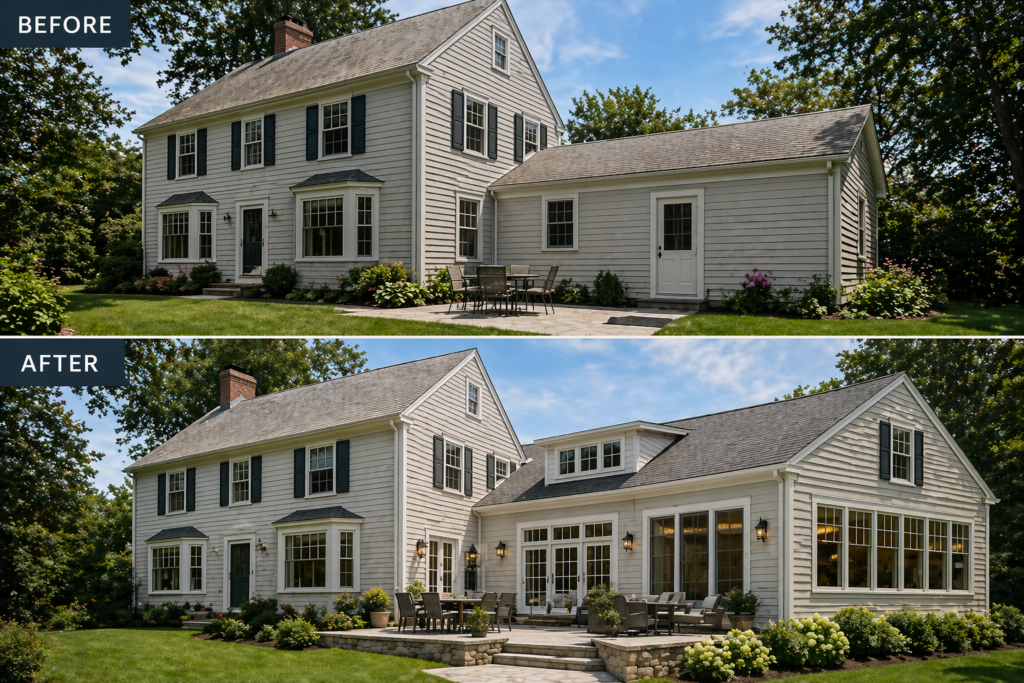
What Design Strategies Ensure Seamless Integration?
Successful additions blend so naturally with existing homes that they appear original to the structure. This architectural harmony requires careful attention to rooflines, exterior materials, window styles, and proportional relationships between old and new spaces.
Match existing exterior materials whenever possible. If exact matches aren’t available due to age or discontinued products, strategically blend materials so transitions appear intentional rather than mismatched. For brick homes, this might mean using the original brick on primary facades while selecting complementary siding for less visible walls.
Creating Interior Flow and Functionality
Interior integration extends beyond matching finishes to creating logical traffic patterns and functional connections. Transitions between existing and new spaces should feel natural rather than abrupt. Consider how doorway placement, ceiling heights, and flooring transitions guide movement through your home.
Maintain consistent flooring throughout connected spaces to create visual continuity. If flooring changes are necessary, position transitions at natural break points like doorways rather than mid-room. Ceiling heights in additions should match existing rooms or use thoughtful design elements like coffered ceilings or beams to address minor height differences.
Maximizing Natural Light and Energy Efficiency
Addition design presents opportunities to enhance your home’s overall energy performance. Modern building codes require higher insulation levels than older homes typically contain, making new additions more efficient than existing spaces. Consider extending efficiency upgrades to adjacent areas during construction.
Strategic window placement captures natural light while managing solar heat gain. South-facing windows with proper overhangs provide passive solar heating in winter while blocking excessive summer sun. Energy-efficient windows, proper insulation, and quality air sealing significantly reduce long-term operating costs.
How Do You Manage Living Through Construction?
Home additions create noise, dust, and disruption to daily routines that require advance planning and realistic expectations. Understanding what to expect helps you prepare mentally and practically for the construction period.
Establish clear boundaries with your contractor about work hours, site access, and protected areas of your home. Most residential construction occurs between 7 AM and 6 PM on weekdays, though local noise ordinances may restrict hours further. Discuss where contractors can park, store materials, and access utilities.
Protecting Your Home and Belongings
Dust containment becomes critical when additions connect to occupied living spaces. Professional contractors use plastic sheeting barriers, negative air pressure systems, and frequent cleaning to minimize dust migration. Move valuable or delicate items away from construction zones and cover furniture in adjacent rooms.
Construction vibrations from demolition or foundation work can affect wall-mounted items throughout your home. Remove hanging pictures, mirrors, and shelving from walls sharing connections with construction areas. Document your home’s existing condition with photos before work begins for insurance purposes.
Creating Contingency Plans
Prepare backup arrangements for essential functions that construction may temporarily disrupt. If your addition affects kitchen or bathroom access, identify alternate spaces or temporary facilities. Some homeowners arrange short-term stays with relatives during particularly disruptive phases like roof connections or utility tie-ins.
Maintain regular communication with your contractor through scheduled site meetings. Weekly progress reviews allow you to address concerns promptly, approve material selections, and stay informed about upcoming milestones requiring your decisions or temporary accommodations.
What Are the Most Important Contract Elements?
A comprehensive written contract protects both homeowner and contractor by clearly defining expectations, responsibilities, and remedies for potential disputes. Never proceed with verbal agreements or incomplete documentation, regardless of contractor reputation.
Essential contract components include detailed project scope describing all work to be performed, specific material brands and grades, complete cost breakdown with payment schedule, and estimated start and completion dates. The agreement should also address permit responsibility, warranty coverage, and change order procedures.
Understanding Payment Structures and Protection
Standard payment schedules release funds based on completed milestones rather than arbitrary dates. Typical schedules include 10% deposit at signing, 25-30% at substantial completion of framing, 25-30% when rough-in work passes inspection, 25-30% at finish work completion, and 10% final payment after final inspection and walk-through.
Never pay the full contract amount before project completion. Retaining 10% until you’ve verified all work meets specifications and passed final inspections protects your leverage for addressing any punch-list items. Avoid contractors demanding payment for materials before delivery or labor before work completion.
| Contract Must-Haves | What to Include |
| Scope of Work | Detailed description of all tasks, materials, and finishes |
| Payment Terms | Total cost, payment schedule tied to milestones, acceptable payment methods |
| Timeline | Start date, estimated completion, provisions for weather delays |
| Change Orders | Process for handling modifications, cost adjustments, timeline impacts |
| Warranties | Coverage for workmanship and materials, duration, claim procedures |
| Cleanup and Disposal | Responsibility for daily cleanup, debris removal, final site restoration |
How Can You Maximize Your Addition’s Return on Investment?
Strategic planning ensures your addition enhances both lifestyle and property value. Not all additions recoup equal percentages of their costs, with returns varying based on addition type, local market conditions, and execution quality.
Bathroom additions typically deliver 50-60% return on investment, while master suite additions return 55-65%. These percentages represent national averages, with specific markets showing considerable variation. Well-designed, properly executed additions in desirable neighborhoods generally perform better than budget projects in declining areas.
Value-Adding Design Choices
Focus additions on high-impact spaces that address genuine market demand. Additional bedrooms and bathrooms consistently add value, particularly in family-oriented neighborhoods where homes with limited bedrooms or single bathrooms face buyer resistance. Home offices have gained substantial appeal following remote work trends.
Quality finishes appropriate to your home’s price point attract buyers without over-improving. Avoid luxury finishes in modest neighborhoods or budget materials in upscale areas. Match or slightly exceed the finish level of your existing home for best results.
For comprehensive information about addition projects and maximizing value, visiting resources like Home Addition Service pages provides detailed insights into professional approaches and best practices.
Frequently Asked Questions About Planning Home Additions
What is the 30% rule for renovations?
The 30% rule suggests homeowners should avoid spending more than 30% of their home’s current value on renovations and additions combined. This guideline helps prevent over-improvement where your investment exceeds what you can reasonably recoup through increased home value. In markets with strong appreciation, this percentage may safely increase, while declining markets warrant more conservative spending. The rule serves as a starting point rather than absolute limit, with individual circumstances and long-term ownership plans influencing appropriate investment levels.
Is it cheaper to build a new house or add an addition?
Home additions typically cost $150-400 per square foot, while new home construction averages $100-200 per square foot, making new construction appear cheaper initially. However, additions avoid land acquisition costs, new utility connections, landscaping expenses, and moving costs that accompany new construction. Additions also preserve existing home equity and neighborhood connections. For homeowners who love their location and existing home layout, additions deliver better overall value despite higher per-square-foot costs. The decision ultimately depends on your specific property, goals, and local real estate market conditions.
Can I draw my own plans for an addition?
While you can create conceptual sketches showing desired layout and features, building departments require professionally stamped architectural and engineering plans for permit approval. Licensed architects or engineers must prepare and certify plans demonstrating code compliance, proper structural calculations, and safe construction methods. DIY plans rarely meet these requirements and risk permit rejection or construction delays. Some design-build firms offer value engineering where they incorporate your ideas into professional drawings, providing cost savings while ensuring technical adequacy and permit approval.
How much should a 20×20 addition cost?
A 400-square-foot (20×20) addition typically costs between $60,000 and $160,000 depending on complexity, finishes, and location. Basic additions with standard finishes trend toward the lower range, while additions requiring foundation work, multiple plumbing fixtures, or premium materials approach higher costs. Second-story additions cost 10-30% more than ground-level construction due to structural reinforcement needs. Regional labor rates, permit fees, and material availability significantly impact final costs. Always obtain detailed quotes from multiple licensed contractors rather than relying on general estimates for accurate budgeting.
What is the cheapest way to add an addition to your house?
Bump-out additions extending existing rooms by 2-8 feet represent the most economical option, often costing $5,000-$30,000 for small expansions. These minimize foundation work and structural modifications while adding functional space. Converting existing areas like garages, attics, or basements into livable space costs less than new construction since exterior walls and roofing already exist. Sunrooms with simple foundations and prefabricated components offer another budget-friendly approach. Maintaining simple rectangular shapes, avoiding complex rooflines, using standard materials, and handling interior finish work yourself where skills permit all reduce costs while maintaining quality and functionality.
Ready to Start Planning Your Home Addition?
Planning a successful home addition requires balancing creative vision with practical considerations like budget, regulations, and construction realities. By following the comprehensive steps outlined in this guide, you’ll avoid common pitfalls and create an addition that enhances both your lifestyle and property value.
The key to addition success lies in thorough upfront planning, selecting qualified professionals, and maintaining realistic expectations throughout the construction process. Take time to research local requirements, interview multiple contractors, and develop detailed plans before committing to construction.
If you’re considering a home addition and want expert guidance through every phase of planning and construction, Chiusano Design Build LLC brings decades of experience helping homeowners transform their living spaces. Our team handles everything from initial design concepts through final inspections, ensuring your addition integrates seamlessly with your existing home while meeting all code requirements and quality standards.
Contact Chiusano Design Build LLC at 845-201-9450 to schedule a consultation and discuss how we can bring your home addition vision to life. We’ll evaluate your property, understand your goals, and provide honest guidance on the most effective approaches for your specific situation and budget.