How to Clean Tile Grout in Hudson Valley Homes (And Actually Keep It Clean)
Cleaning tile grout doesn’t have to mean hours of scrubbing or expensive professional treatments every month. This guide walks Hudson Valley homeowners through the most effective methods for removing dirt, stains, and mold from grout lines, recommends safe household products, and explains when a DIY approach is enough versus when a tile professional makes more sense.
If you’ve ever gotten down on your hands and knees with a toothbrush and a bottle of bleach, scrubbing grout lines that just won’t come clean, you already know how frustrating this job can be. The tile looks beautiful when it’s fresh. But grout is porous, it sits in high-traffic areas, and it absorbs everything from cooking grease to bathroom moisture to muddy boot prints. In Hudson Valley homes especially, where older construction and seasonal humidity are common, grout can go from white to gray to near-black faster than most homeowners expect.
Key Takeaways
- Baking soda and hydrogen peroxide is one of the safest and most effective DIY grout-cleaning combinations for most tile types.
- Heavily stained or moldy grout may require an oxygen-based cleaner or diluted bleach solution, used carefully.
- Sealing grout after a deep clean dramatically slows future staining and reduces how often you need to scrub.
- Acidic cleaners like vinegar can damage certain grout types and should be used with caution or avoided entirely on natural stone tile.
- Grout that is crumbling, cracking, or persistently dark despite cleaning may need professional regrout rather than just repeated scrubbing.
- Routine light cleaning every one to two weeks prevents the buildup that makes deep cleaning necessary in the first place.
Why Does Grout Get So Dirty in the First Place?
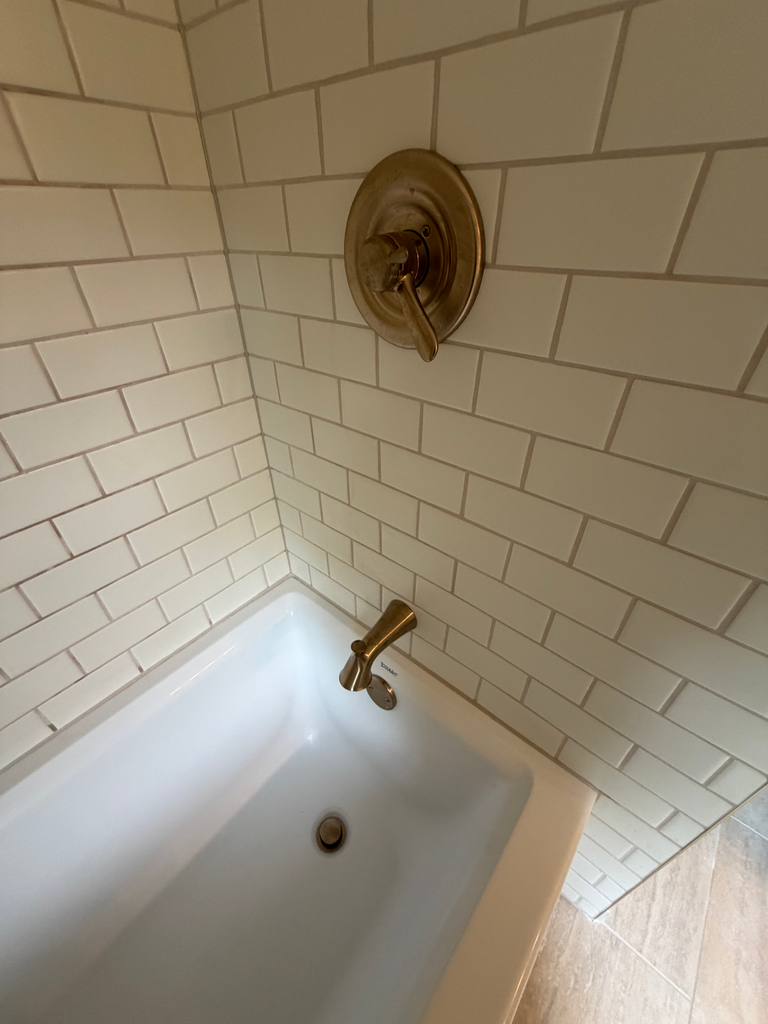
Grout is made from a cement-based mixture that cures hard but remains microscopically porous. Those tiny pores act like sponges, pulling in soap scum, body oils, hard water minerals, mold spores, and general grime over time. The result is discoloration that goes beyond the surface and resists casual wiping. Unlike tile itself, which has a sealed glazed face, grout doesn’t have a natural protective barrier unless one is applied after installation.
Unsanded grout, commonly used in wall tile applications with joints under 1/8 inch, absorbs stains faster than sanded grout because its finer texture creates a tighter but more porous matrix. Sanded grout, used for floor tile with wider joints, is slightly more resistant to surface staining but still requires regular sealing to maintain its appearance over time.
In Hudson Valley homes, humidity is a genuine factor. Wet seasons, older bathroom ventilation, and homes that weren’t built with modern moisture management in mind all create conditions where mold and mildew take hold in grout faster than in drier climates. That dark discoloration in your shower corners often isn’t just dirt. It’s biological growth that needs to be treated differently than everyday grime.
What’s the Best Method for Cleaning Standard Grout?
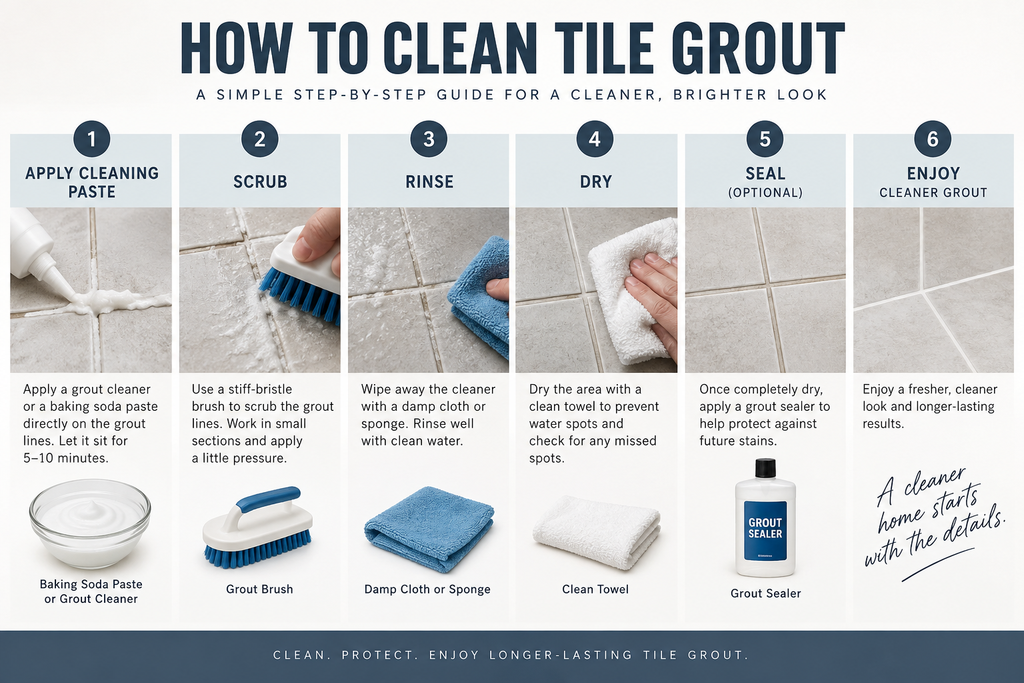
For most homeowners dealing with everyday discoloration and light staining, a paste made from baking soda and hydrogen peroxide is the go-to approach. It’s affordable, safe for most tile surfaces, non-toxic for families and pets, and genuinely effective. Mix three parts baking soda to one part hydrogen peroxide until you get a thick paste, apply it directly to the grout lines, and let it sit for at least 10 to 15 minutes before scrubbing with a stiff-bristled brush.
The scrubbing tool matters more than most people realize. A dedicated grout brush with a narrow head lets you apply focused pressure directly into the joint. An old toothbrush works for small areas. Electric scrubber attachments fit for a drill can save significant time on large floors. The goal is mechanical agitation combined with the chemical action of the paste, not just one or the other.
Steam cleaners are considered one of the most effective and chemical-free methods for sanitizing grout. The high-temperature steam penetrates porous surfaces and kills mold spores and bacteria without the need for added cleaners. Studies on steam cleaning for household surfaces have shown it can eliminate up to 99.9% of common household bacteria when applied at temperatures above 212°F.
Once you’ve scrubbed, rinse the area thoroughly with clean water. Leaving cleaning residue in the grout can attract more dirt over time, which is the last thing you want after putting in all that work.
How Do You Tackle Heavily Stained or Moldy Grout?
When standard scrubbing isn’t cutting through the discoloration, it’s time to escalate. Oxygen bleach cleaners, sold as powder-based products you mix with water, are a strong option that’s less harsh than chlorine bleach. They work by releasing oxygen molecules that break apart stain compounds within the porous grout. For best results, apply the solution, cover the area loosely to slow evaporation, and let it dwell for 30 minutes or longer before scrubbing.
For active mold or mildew, a diluted chlorine bleach solution (roughly one part bleach to ten parts water) applied directly to the grout and left for 10 minutes can be effective. Ventilation is critical when using bleach indoors. Open windows, run fans, and never mix bleach with any other cleaner, particularly ammonia or vinegar, since those combinations create toxic fumes.
Tile and grout cleaning professionals typically charge between $0.50 and $3.00 per square foot for professional steam cleaning and sealing services, depending on the condition of the grout, tile type, and local labor rates. In the Hudson Valley region, homeowners should expect costs on the higher end of that range for specialized tile restoration work, particularly in older homes with original ceramic or natural stone tile.
A word of caution about natural stone tile: if your floors or walls feature marble, travertine, limestone, or slate, acidic cleaners including vinegar and some commercial products can etch the surface permanently. Always check what your tile is made of before applying any cleaner you haven’t tested on a hidden spot first. If you’re unsure, understanding how to grout tile correctly from the start can save you from costly mistakes later.
Which Household Products Are Actually Safe to Use on Grout?
The cleaning products sitting under your kitchen sink right now are probably enough to handle most grout jobs. Here’s a straightforward breakdown of what works and what to avoid.
Safe and effective options:
- Baking soda is mildly abrasive, pH neutral, and works well as a base for paste cleaners.
- Hydrogen peroxide (3% solution) brightens grout and has antimicrobial properties without the harshness of bleach.
- Dish soap cut with warm water handles routine grime on wall tile and backsplashes effectively.
- Oxygen bleach powder (such as OxiClean) is color-safe, effective on organic stains, and gentler than chlorine bleach.
- Diluted chlorine bleach works for mold and mildew but should be used sparingly and rinsed thoroughly.
Products to use with caution or avoid:
- White vinegar is often recommended online but is acidic enough to weaken cement-based grout over time and should never be used on natural stone.
- Ammonia-based cleaners can discolor certain grout colors and should not be mixed with any bleach product.
- Abrasive powders or steel wool will scratch tile glazing and damage grout texture.
If you’ve had tile work done recently and noticed chips or cracks near the grout lines, it’s worth reading about how to fix chipped tile before cleaning, since damaged tile edges can worsen with aggressive scrubbing.
How Often Does Grout Actually Need to Be Cleaned?
Tile industry guidelines generally recommend light grout cleaning every one to two weeks in high-use areas like bathrooms and kitchens, with a deeper cleaning and resealing every six to twelve months depending on traffic levels and moisture exposure. Grout sealers typically last between one and three years before they need to be reapplied, though penetrating sealers tend to outlast surface-coat varieties by a significant margin.
The honest answer is that it depends entirely on where the tile is and how much traffic it sees. A bathroom used by a family of four every day needs more frequent attention than a laundry room floor. Kitchen backsplashes collect cooking grease but dry quickly, which means grime tends to stay on the surface and cleans up more easily than bathroom grout that’s constantly wet.
The best practice is to wipe down tile surfaces weekly as part of regular cleaning and do a targeted grout scrub monthly. Save the deep cleaning with paste or oxygen bleach for every few months, or whenever you notice the grout has shifted noticeably darker. Staying ahead of buildup is far less work than trying to reverse years of neglect.
What Can You Do to Keep Grout Clean After a Deep Clean?
All that scrubbing work means nothing if you don’t protect what you’ve just restored. Sealing is the single most important thing you can do after a deep clean. A penetrating grout sealer soaks into the porous surface and creates a barrier that significantly slows the absorption of oils, water, and staining agents. Apply it to completely dry grout, wipe away any excess from the tile face, and allow full cure time before exposing the surface to water again.
Beyond sealing, daily habits make a measurable difference. Squeegeeing shower walls after each use, running the exhaust fan for at least 15 minutes post-shower, and wiping kitchen tile backsplashes after cooking all reduce the moisture and residue that feeds discoloration. These aren’t dramatic changes, but they stack up over months and years in a way that keeps grout looking intentional rather than neglected.
For Hudson Valley homeowners with older homes or original tile that has seen decades of use, sometimes the grout itself is beyond cleaning. Crumbling, cracked, or structurally compromised grout can’t be scrubbed back to health. That’s when regrout becomes the right conversation. The team at Chiusano Design Build offers professional tile work services across the Hudson Valley, including grout repair, replacement, and full tile restoration for homes where DIY methods have hit their limit.
Frequently Asked Questions About Cleaning Tile Grout
What is the best way to clean tile grout?
The most reliable DIY method is a paste made from baking soda and hydrogen peroxide, applied directly to the grout lines and left to sit before scrubbing with a stiff brush. For larger areas or more persistent staining, an oxygen bleach solution offers stronger action without the harshness of chlorine bleach. Always rinse thoroughly and consider applying a grout sealer once the surface is clean and dry.
How do you clean heavily stained grout?
Heavily stained grout benefits from longer dwell times and stronger cleaning agents. Oxygen bleach powders mixed with warm water and left on the grout for 30 minutes or more can break down deep staining effectively. For mold or mildew, a diluted chlorine bleach solution applied carefully with proper ventilation is usually the most direct solution. If repeated deep cleaning still doesn’t restore the grout’s appearance, professional regrout may be the more practical path forward.
What household products are safe to use on grout?
Baking soda, hydrogen peroxide, oxygen bleach powder, and diluted dish soap are all safe options for most cement-based grout. Chlorine bleach works but should be diluted and used sparingly. Avoid white vinegar on natural stone tile and never use acidic cleaners on marble, travertine, or limestone, since these can cause irreversible etching to both the tile and the grout.
How often should tile grout be cleaned?
For high-use areas like bathrooms and kitchens, a light cleaning every one to two weeks keeps surface buildup from becoming embedded grime. A targeted scrub with a cleaning paste or solution should happen monthly, and a full deep clean with resealing is worth doing every six to twelve months. Grout in lower-traffic areas like utility rooms or hallways can go longer between deep cleanings.
How can you keep grout clean after deep cleaning?
Sealing the grout immediately after a deep clean is the most effective long-term protection you can apply. Beyond that, reducing the moisture and residue that gets left on tile surfaces daily makes a significant difference. Regular light cleaning, squeegee use in showers, and good ventilation all extend the time between deep cleaning sessions and keep grout looking its best.
Ready to Restore Your Tile? Here’s Your Next Step
Cleaning grout is one of those home maintenance tasks that feels small until it isn’t. When you get ahead of it with the right products and a consistent routine, tile stays looking sharp for years. When it goes too long without attention, especially in the moisture-heavy conditions common to Hudson Valley homes, the work required starts to exceed what a weekend afternoon and some baking soda can fix.
Imagine walking into a bathroom where the tile looks the way it did when it was first installed. The grout lines are clean and consistent, the surface feels fresh, and you’re not mentally calculating how many hours of scrubbing it would take to get there. That’s genuinely achievable, either through the right DIY approach or through professional tile restoration when the situation calls for it.
If your tile or grout has reached the point where cleaning alone won’t solve the problem, Chiusano Design Build is here to help. Serving Hudson Valley homeowners with skilled tile installation, repair, and restoration, the team brings the kind of craftsmanship that makes a real, lasting difference. You can contact Chiusano Design Build online or call directly at 845-201-9450 to talk through what your tile needs and get a free quote. No pressure, just honest advice from people who do this work every day.