

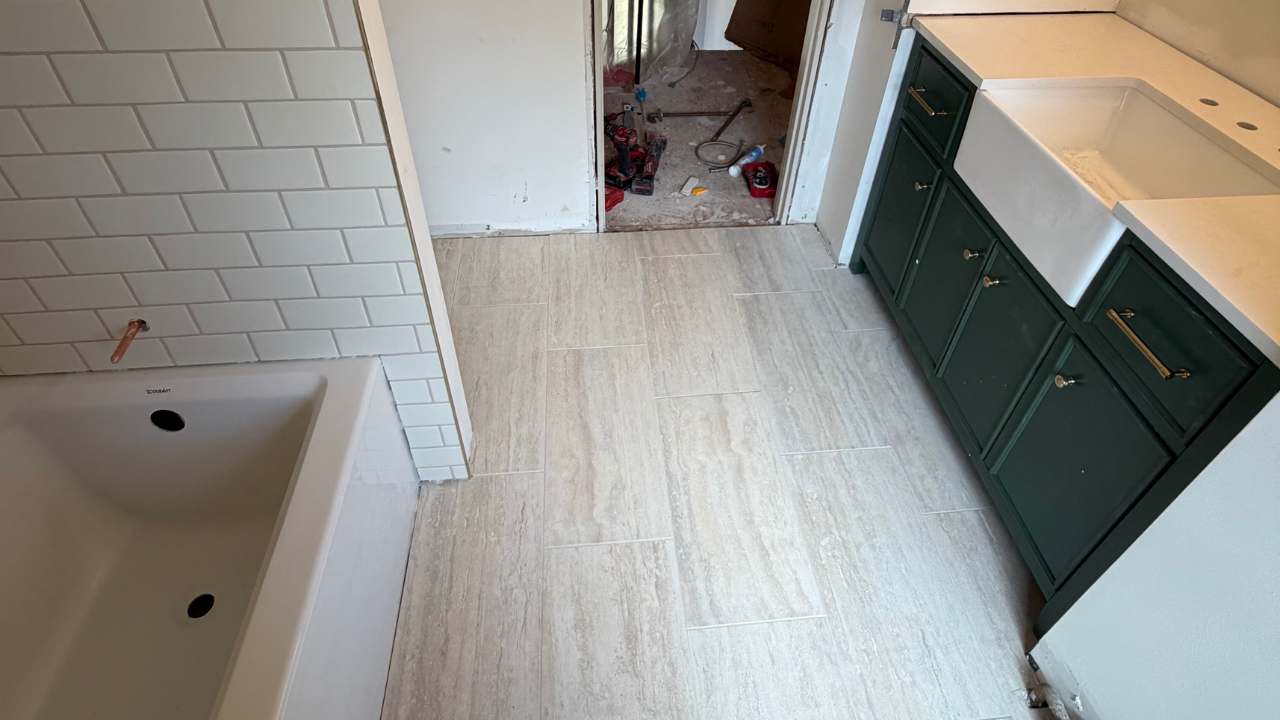
How to Grout Tile in Hudson Valley Homes: The Right Way to Do It
Grouting tile correctly is the difference between a finish that lasts decades and one that cracks, stains, or crumbles within a year. This guide walks you through every step of the grouting process, from choosing the right grout type to mixing, applying, cleaning, and sealing, with expert insights relevant to Hudson Valley homes and climate conditions.
You spent hours laying tile perfectly. The spacing is even, the adhesive has cured, and the surface looks exactly how you imagined it. Then comes grouting, and suddenly the finish looks chalky, smeared, or uneven. It’s one of the most common frustrations in tile work, and almost always, it comes down to technique. Getting grouting right isn’t complicated once you understand what you’re actually doing and why each step matters.
Key Takeaways
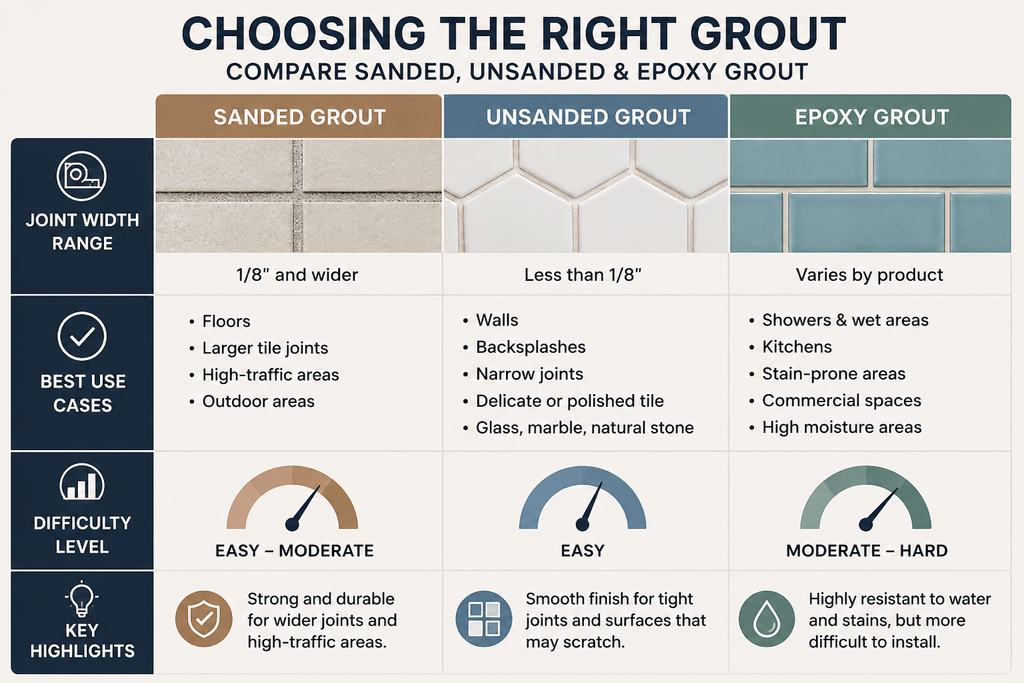
- Grout type matters: unsanded grout works for joints under 1/8 inch; sanded grout is for anything wider.
- Mixing consistency is critical. Grout should feel like thick peanut butter, not soupy or stiff.
- You typically have a 20-30 minute working window before grout begins to set on the surface.
- Wait at least 15-30 minutes after application before doing your first cleaning pass, but don’t wait too long.
- Most grout needs 24-72 hours before light use and up to 28 days to fully cure.
- Sealing grout is strongly recommended to prevent staining, moisture absorption, and long-term damage.
Why Does Grouting Go Wrong for Most DIYers?
Most tile grout failures aren’t about the product itself. They’re about timing and preparation. Homeowners often rush the cleaning phase, use too much water in the mix, or skip sealing entirely. Each of these mistakes compounds over time, especially in Hudson Valley homes where seasonal humidity swings and cold winters put real stress on tiled surfaces in kitchens, bathrooms, and mudrooms.
Industry estimates suggest that improper grouting technique accounts for a significant portion of tile-related callbacks and repair calls, with cracking and discoloration being the most frequently reported issues within the first two years of installation. These failures are largely preventable with correct application and curing practices.
The good news is that grouting is a learnable skill. Once you understand the logic behind each step, the process starts to feel intuitive rather than nerve-wracking. Let’s go through it from the beginning.
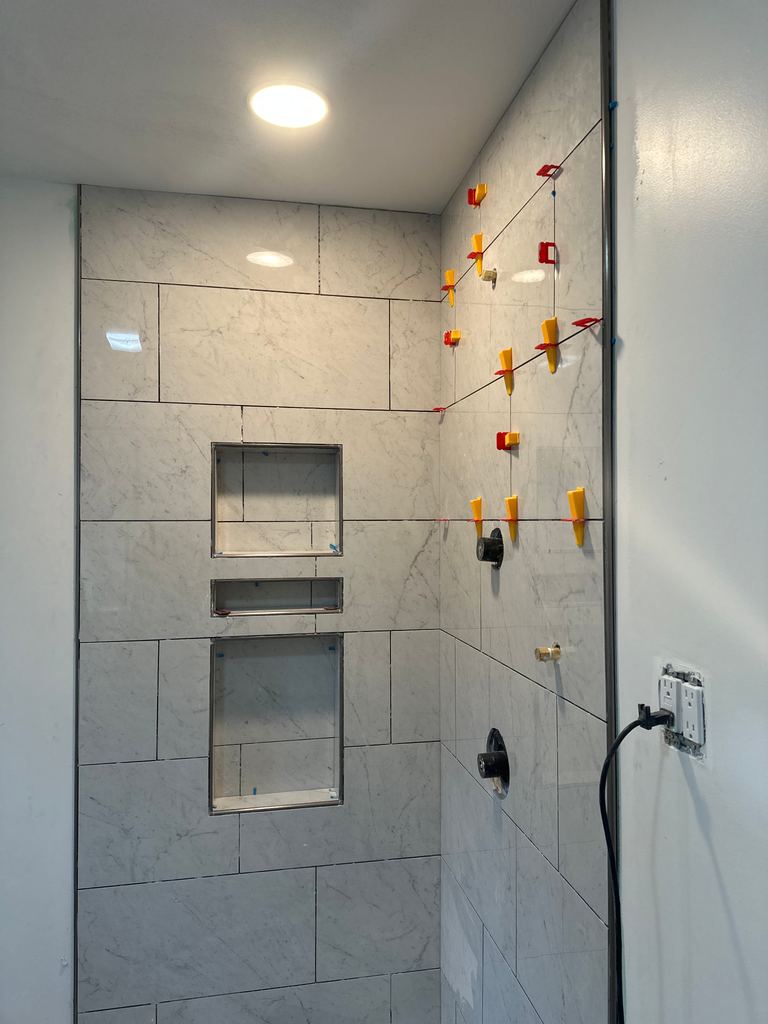
What Tools and Materials Do You Need Before You Start?
Having everything ready before you open the bag of grout is non-negotiable. Grout begins working the moment it hits water, and scrambling for a missing tool mid-application is how mistakes happen. Here’s what you’ll need within arm’s reach:
- Grout (sanded or unsanded, depending on joint width)
- Grout float (a rubber-backed trowel for spreading)
- Two buckets of clean water
- Multiple large, clean sponges
- Mixing paddle or stir stick
- Grout sealer (for after curing)
- Painter’s tape (optional, for protecting delicate tile edges)
- Rubber gloves and eye protection
For most residential tile work, a standard grout float handles the application. If you’re working on a large floor area, consider kneepads. For wall tile, especially in showers, a margin trowel can help you press grout into vertical joints more effectively.
Sanded vs. Unsanded: Which Grout Type Is Right for Your Project?
Unsanded grout is formulated for joints 1/8 inch wide or narrower. It has a smoother texture that flows into tight spaces without shrinking excessively. Sanded grout contains fine sand particles that give it body, making it the right choice for joints between 1/8 inch and 1/2 inch wide. Using sanded grout in narrow joints can scratch polished tile surfaces, while unsanded grout in wide joints tends to shrink and crack as it dries.
There’s also epoxy grout, which is a separate category entirely. It’s highly stain-resistant and extremely durable, making it a strong choice for commercial kitchens or high-traffic areas. It’s significantly harder to work with than cement-based grout and is typically best left to professionals unless you have prior experience with it.
How Do You Mix Grout to the Right Consistency?
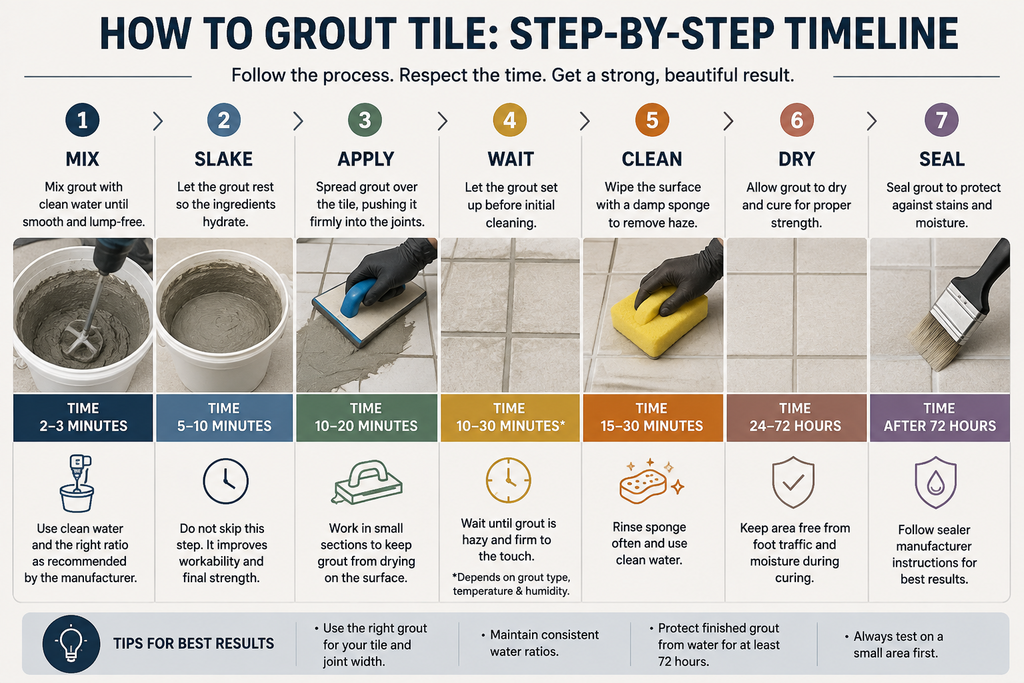
Start by adding clean water to a clean bucket first, then slowly add the grout powder. This order helps prevent clumping. Mix thoroughly until you reach a consistency similar to thick peanut butter. It should hold its shape when you scoop it with a trowel, not run or drip.
Once mixed, let the grout rest for about 5-10 minutes. This process, called slaking, allows the dry particles to fully absorb the water and the chemistry to activate properly. After slaking, give it one more brief stir before you begin applying. Skipping this step often results in grout that seems fine at first but develops inconsistencies in hardness and color as it cures.
Most grout manufacturers recommend a water-to-powder ratio that yields a working time of approximately 20 to 30 minutes at room temperature before the grout begins to stiffen on the surface. Warmer ambient temperatures and lower humidity can shorten this window significantly, which is particularly relevant during summer months in Hudson Valley when interior temperatures can spike without air conditioning.
How Do You Apply Grout Without Making a Mess of It?
Work in manageable sections, typically 10-15 square feet at a time. Scoop grout onto the surface and use your float at a 45-degree angle to press it firmly into the joints. Use diagonal sweeping strokes across the tile lines rather than running parallel to them. This technique forces grout into the joint fully rather than dragging it back out.
Once an area is filled, hold the float at a steeper angle (closer to 90 degrees) and swipe diagonally again to remove excess grout from the tile face. You won’t get it all, and that’s fine. You’re just reducing the amount that needs to be cleaned up later. Don’t spend too long in one spot trying to make it perfect at this stage.
How Do You Clean Grout Haze Without Ruining the Finish?
This is where most people run into trouble. Timing your cleaning pass is everything. Wait about 15-30 minutes after application, then test a small area with a lightly dampened sponge. If the grout in the joints smears or pulls out, wait another 10 minutes and test again. When it holds its shape under light pressure, you’re ready.
Use a barely damp sponge and work in circular motions, then follow up with a clean, diagonal swipe to avoid pulling grout from the joints. Rinse your sponge frequently and use two buckets of clean water: one for rinsing, one for your final wipe. Change the water often. Working with dirty, grout-laden water drags residue back across the tile and creates the hazy film people complain about.
After your first cleaning pass, a thin haze may still remain on the tile surface. That’s normal. Once the grout has dried fully (usually 24 hours), you can buff this off with a dry microfiber cloth. For stubborn haze, a diluted solution of white vinegar and water works well on most ceramic and porcelain tile, though avoid acidic cleaners on natural stone.
Frequently Asked Questions About Grouting Tile
How do you grout tile properly?
Proper grouting starts with choosing the right grout type for your joint width, mixing to a thick but workable consistency, and applying it in diagonal strokes with a grout float. Work in small sections, press firmly into the joints, and clean the surface in stages as described above. Patience during the cleaning phase is what separates a clean finish from a hazy, uneven one.
How long should grout sit before wiping it off?
Generally, you should wait 15 to 30 minutes before attempting your first cleaning pass. This gives the grout time to begin firming up in the joints while still remaining soft enough on the tile surface to wipe away easily. Waiting too long, much beyond 45 to 60 minutes, can make the surface residue significantly harder to remove and may require more aggressive cleaning products.
How long does grout need to dry before using the tiled area?
Most cement-based grouts are safe for light foot traffic after 24 hours. Full curing, however, takes considerably longer. Complete cure is typically reached at around 28 days, during which time the grout continues to harden and strengthen at a molecular level. Avoid heavy use, wet exposure, or applying sealer before the manufacturer’s stated initial cure time, which is usually 48-72 hours at minimum.
Do you need to seal grout after it dries?
For cement-based sanded and unsanded grout, sealing is strongly recommended. Unprotected grout is porous and will absorb water, oils, and pigments from spills, leading to staining that’s very difficult to reverse. Epoxy grout does not require sealing because it’s naturally non-porous. In high-moisture areas like showers, sealing cement grout annually is a smart habit that dramatically extends the life of the installation.
How do you prevent grout from cracking or crumbling?
Cracking usually results from one of a few causes: insufficient substrate support, using the wrong grout type for the joint width, adding too much water to the mix, or skipping expansion joints where tile meets walls or changes direction. Crumbling often points to a mix that was too dry or a curing period that was interrupted by water exposure too early. Using a high-quality grout, mixing carefully, and allowing proper cure time goes a long way toward preventing both problems.
Ready to Get It Done Right the First Time?
Grouting tile is one of those skills that sounds straightforward until you’re mid-project and things start going sideways. The steps aren’t difficult, but the timing, the mixing ratio, the cleaning technique, and the sealing process each require attention. When it all comes together, the result is a surface that looks sharp, holds up to daily use, and stays beautiful for years without constant maintenance.
Imagine walking into a bathroom where the tile lines are crisp, the color is even, and there’s none of that chalky haze or hairline cracking that shows up in rushed work. That’s what correct grouting delivers, and it’s well worth taking the time to do it properly.
If you’re tackling a tile project in the Hudson Valley and want the confidence that comes with professional execution, the team at Chiusano Design Build brings that level of craft to every job. Whether it’s a bathroom renovation, kitchen backsplash, mudroom floor, or full addition, we handle tile work with the precision it deserves. Call us at 845-201-9450 to talk through your project and get a free estimate. We serve homeowners throughout Hudson Valley, including Newburgh, Poughkeepsie, Kingston, Rhinebeck, and surrounding communities.




2 Comments
Comments are closed.